A head-to-head look at screenshot Figma extensions versus manual copy-paste workflows, covering what designers actually prefer, which tools win for speed and fidelity, and how to choose the right approach for your research process.
TLDR: Screenshot Figma extensions beat manual copy-paste on every practical measure: speed, metadata preservation, batch capture, and collection organization. Manual methods still have a niche for one-off spot checks. For serious design research, dedicated tools like InspoAI close the loop between capturing inspiration and using it in Figma.
Table of Contents
- What is a screenshot to Figma extension?
- How does manual copy-paste compare?
- What are the biggest frustrations with manual methods?
- Which screenshot to Figma tools do designers actually use?
- Can a screenshot Figma extension preserve design tokens?
- Is screenshot-to-Figma better for inspiration or production?
- What should you look for when choosing a screenshot Figma extension?
- Conclusion
Introduction
Every UI/UX designer has been there: you find a UI pattern you love, screenshot it, and then spend ten minutes wrestling it into Figma. You scale the image, it looks blurry. You try to copy-paste a component, the styles don't transfer. By the time you are done, the inspiration moment has passed.
A dedicated screenshot Figma extension promises to solve that friction. But designers remain split on whether a specialized tool is worth the workflow change, or whether a quick Command+Shift+4 and a paste still gets the job done faster.
This article breaks down both approaches head-to-head: what each method actually looks like in practice, where each one fails, and what the community data says about which method designers prefer in 2025.
What is a screenshot to Figma extension and how does it work?
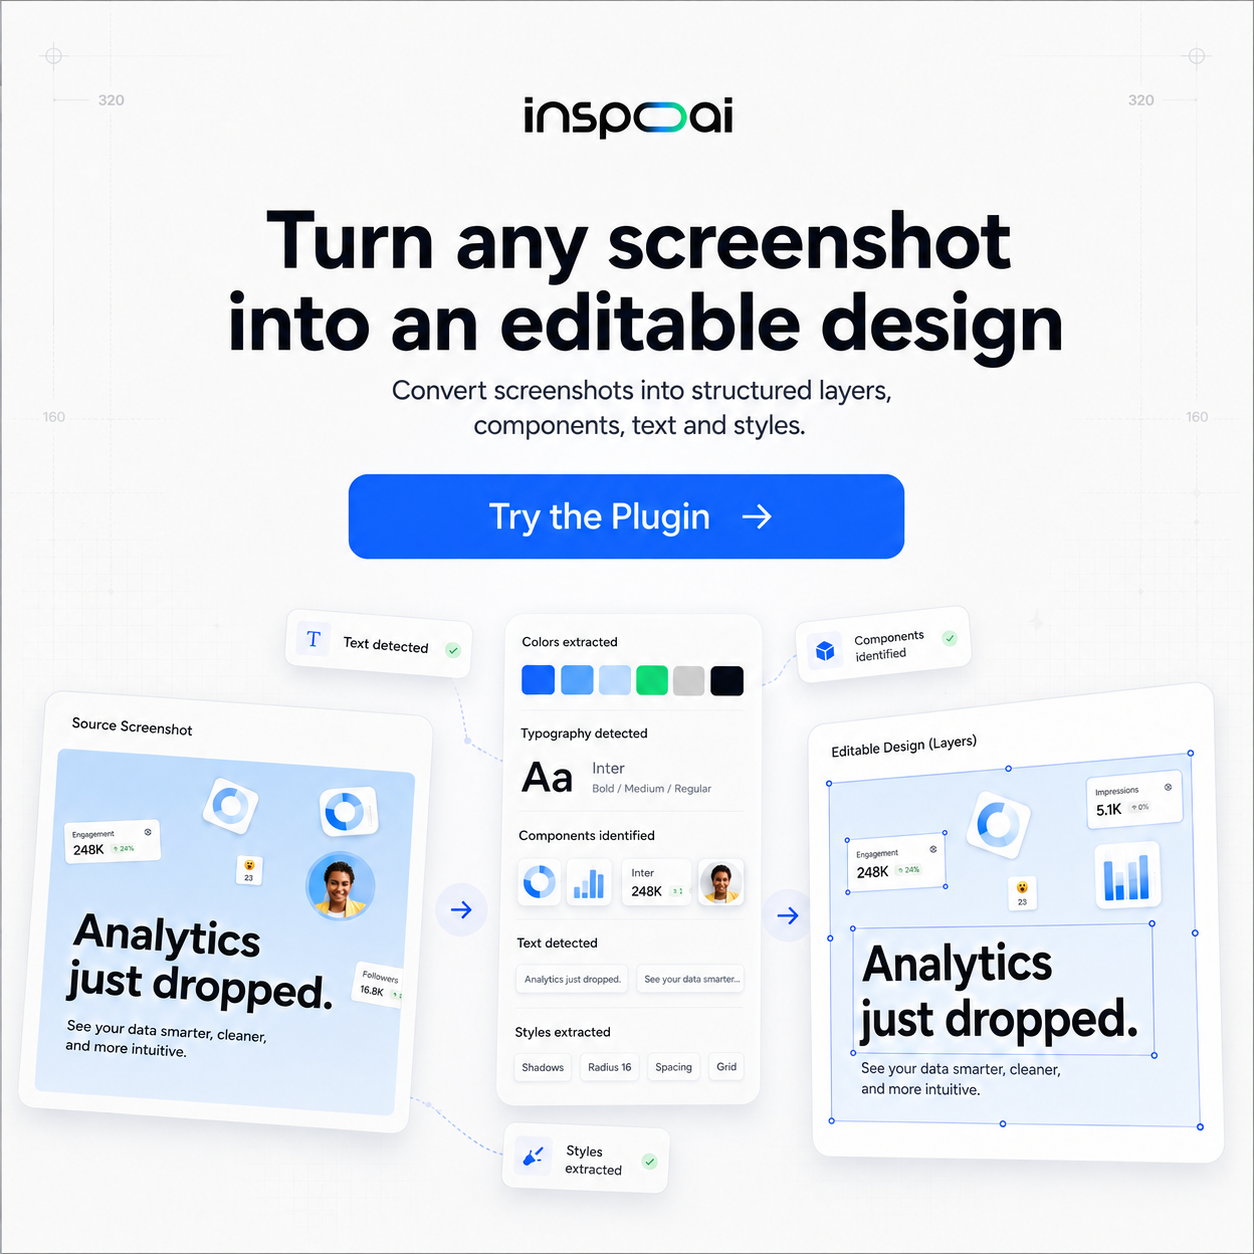
A screenshot Figma extension is a browser plugin or Figma plugin that captures a web page, UI pattern, or design reference and transfers it directly into a Figma file, either as a flat image or as an editable layer structure. The best tools go further: they can extract color palettes, font names, spacing values, and component boundaries from the captured page.
There are two delivery mechanisms. Browser-side extensions capture pages while you browse and push the assets to a connected Figma file or a design library. Figma-native plugins, on the other hand, run inside Figma and let you specify a URL or paste a screenshot that the plugin then processes.
Popular browser-based options include the Figma browser extension, PixelSnap, and GoFullPage for raw captures. On the Figma plugin side, tools like "Image to Figma Design" (4.5K+ installs) use AI to attempt layer reconstruction from screenshots. More holistic platforms like InspoAI add a capture-to-library layer between the browser and Figma, letting you tag, organize, and bulk-export curated screenshots to Figma in one pass. This is especially useful when you accumulate dozens of references across a research session.
The key differentiator is fidelity. A raw screenshot brings pixels into Figma. An intelligent extension can bring structured design information. Source: Figma Community Plugin Directory
How does manual copy-paste compare to using a Figma screenshot plugin?
Manual copy-paste is faster for a single asset: press a keyboard shortcut, copy, open Figma, paste. Total time is around 20 seconds per asset for an experienced designer. That speed advantage disappears the moment you are collecting more than five references.
With manual capture, you lose context immediately. A flat PNG inside Figma has no URL, no capture date, no notes about why you saved it, and no grouping with related screens. Six weeks into a project, that grid of unlabeled screenshots becomes archaeology, not reference.
The practical difference compounds during project handoffs. When a designer sends a Figma file to a developer, unlabeled screenshot references create confusion. A plugin-based workflow that attaches source URLs and metadata to each frame eliminates that confusion.
Community discussions on r/UI_Design confirm this pattern: designers overwhelmingly use manual methods for quick one-off captures but switch to extension-based workflows when the project demands systematic inspiration research. Source: Reddit r/UI_Design
The real comparison is not speed per asset. It is total research session cost. A manual workflow that takes 20 seconds per capture but creates 45 minutes of re-organization later loses badly to a plugin workflow that takes 35 seconds per capture and organizes itself automatically.
What are the biggest frustrations with manual copy-paste for Figma?
Three frustrations dominate designer complaints about manual copy-paste into Figma.
Image quality degradation. Standard OS screenshots capture at display resolution. On a Retina display that is 2x, but on a standard 1080p monitor the captured asset is already soft. When pasted into Figma and scaled up even slightly, the reference image becomes too blurry to use as a detail reference. Full-page capture tools like GoFullPage solve this for web pages, but they do not integrate the capture into an organized library.
No source metadata. A PNG in a Figma frame has no URL, timestamp, or context. Two weeks later, a designer trying to re-visit the original site to check an updated version of the design cannot do so without manual investigation.
Re-organization overhead. Manual copy-paste leaves assets scattered. Designers build ad hoc naming systems ("ref_darkmode_1", "ref_darkmode_2_FINAL") that become unmaintainable. A 2025 survey from Eagle.cool found that designers spend up to 30 minutes per session on reference organization that could be automated.
Layer pollution. Paste an image into Figma without a parent frame and it floats on the canvas. At scale, a reference-heavy Figma file becomes slow and hard to navigate.
These frustrations are not minor. They are the primary reason extension-based workflows have gained adoption even among designers who strongly prefer keyboard shortcuts for everything else.
Which screenshot to Figma tools are most popular among designers?
The most-used screenshot Figma tools in 2025 split across two categories: pure capture utilities and full design research platforms.
Pure capture utilities:
- GoFullPage (Chrome): Full-page scrolling screenshots, exports as PNG or PDF. No Figma integration but high-fidelity output.
- Awesome Screenshot: Annotate before exporting, basic organization. Limited Figma integration.
- Figma's native "Import Image": Drag-and-drop PNG or JPG into Figma. Simple but no metadata.
AI-assisted Figma plugins:
- Image to Figma Design: Uses AI to attempt layer reconstruction. Results vary by screenshot complexity.
- UXMagic Screenshot to Code/UI: Converts screenshots to editable Figma components. Source: UXMagic
Full research platforms:
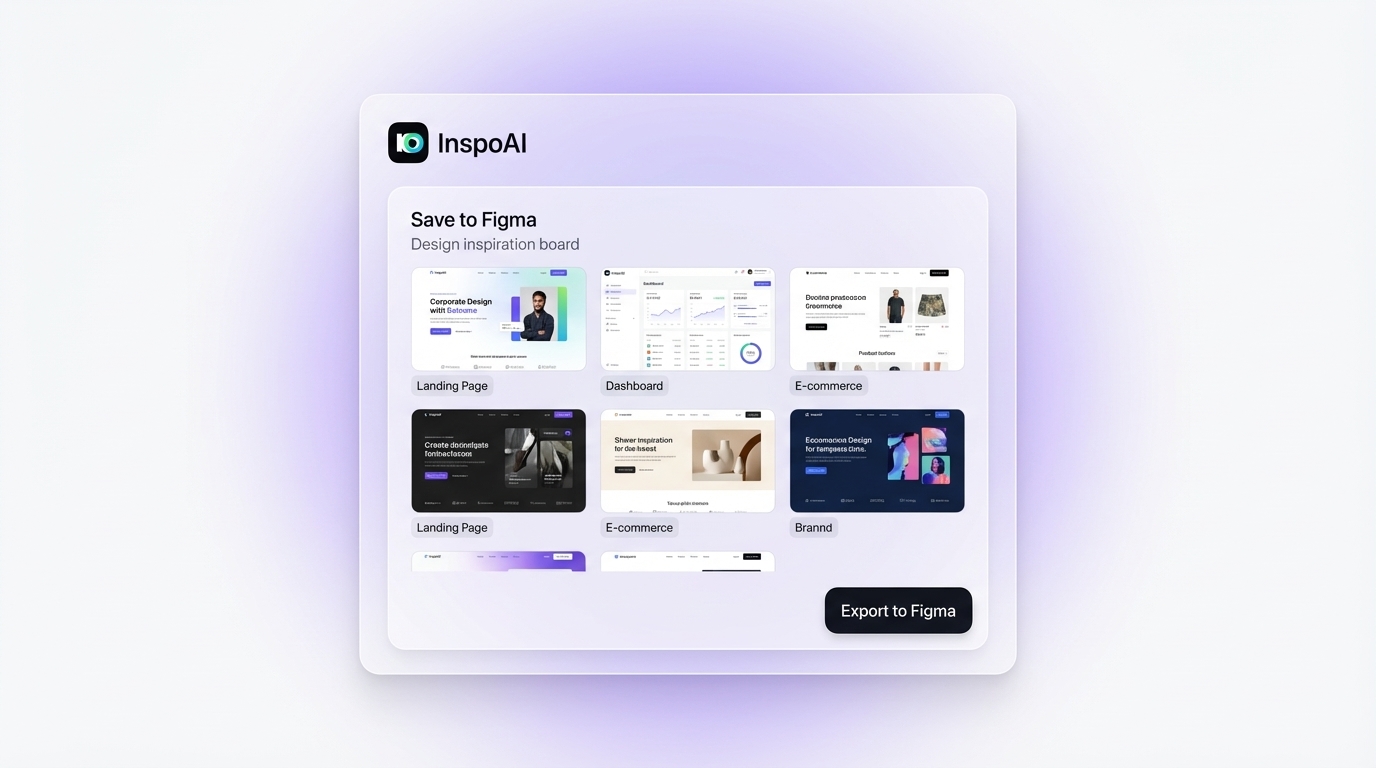
- InspoAI: Captures inspiration during browsing, organizes into tagged collections, and exports organized boards to Figma. Adds AI search, moodboard building, and brand scanning on top of capture.
- Eagle: Desktop app for managing design references with browser capture. Requires desktop install.
- Mobbin / Screenlane: Curated screenshot libraries rather than live capture.
For pure Figma integration speed, the Image to Figma Design plugin wins on simplicity. For research-grade workflows where organization and searchability matter, InspoAI's capture-to-library approach handles the full journey from initial screenshot to organized Figma-ready reference board.
Can a screenshot Figma extension preserve design tokens and styles?
Partial preservation is possible; full fidelity is not. A screenshot is a rasterized image. Unless the tool performs CSS extraction alongside the capture, colors, font names, and spacing values exist only as pixels.
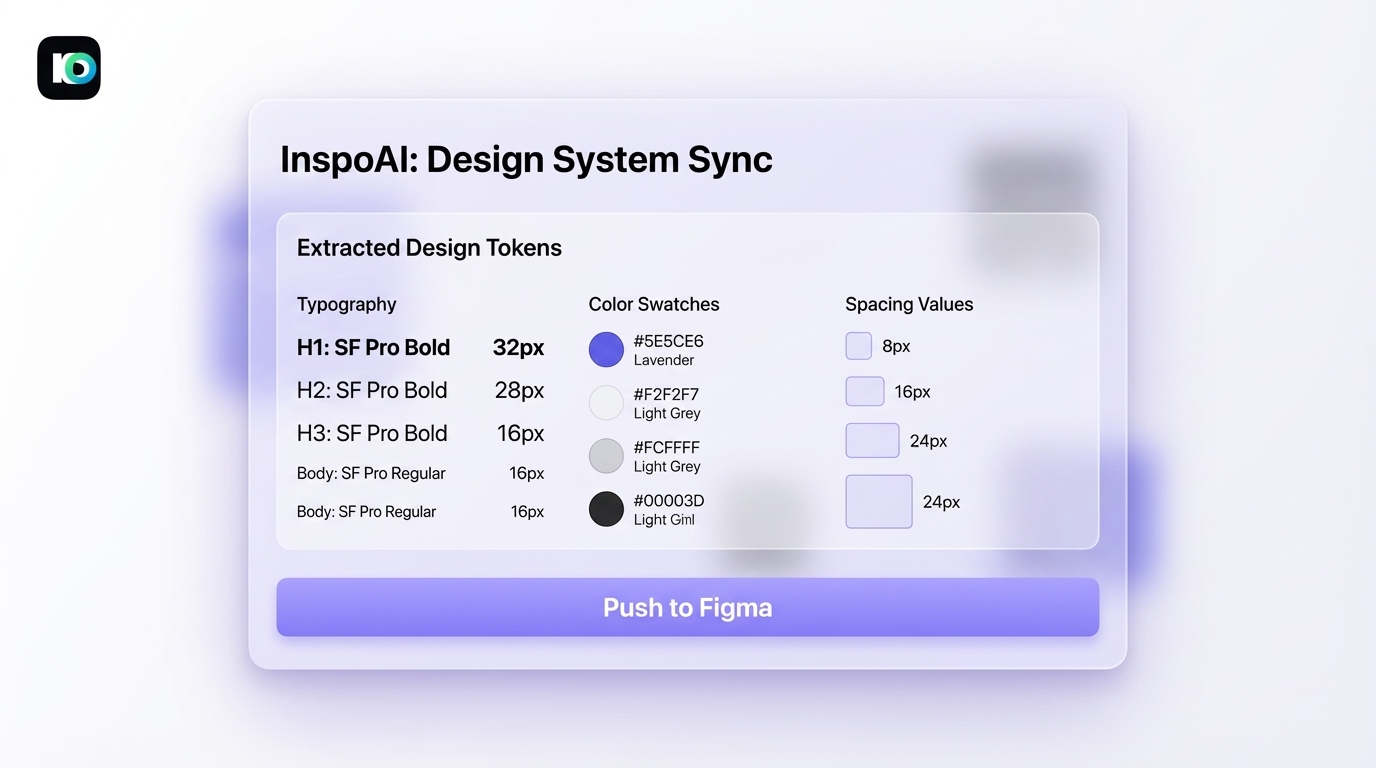
The tools that come closest to preserving design information use a two-step approach. First, they capture the screenshot. Second, they run a parallel CSS/DOM analysis to extract computed styles from the live page. The output is a Figma frame with the screenshot as a background plus an overlay of extracted color swatches, font names, and spacing measurements.
This is exactly what InspoAI's Brand Scanner does when you feed it a URL: it extracts the site's primary colors, typography stack, button shapes, and spacing tokens without you having to open DevTools manually. The extracted tokens export as a Figma-ready style set.
For production-level token sync, tools like Tokens Studio for Figma still outperform any screenshot-based approach. But for inspiration research, where you want to quickly understand "what design system does this company use," a screenshot extension with CSS extraction covers 80% of what you need. The remaining 20% that requires hand-measurement can be completed in Figma after import. Source: Figma Blog
Is screenshot-to-Figma better for inspiration research or production work?
Screenshot-to-Figma tools are purpose-built for inspiration research and competitive analysis. They are not a replacement for production-grade Figma workflows.
For inspiration research, the value proposition is clear: capture reference sites quickly, organize them with context, and bring them into Figma without manual re-organization. A designer building a component library for a SaaS dashboard benefits enormously from having 40 curated dark-mode SaaS UI references organized in Figma rather than 40 unlabeled PNGs scattered across a desktop.
For production work, screenshot-based methods fall short. You cannot extract interactive states, hover behaviors, or responsive breakpoints from a screenshot. Animations and micro-interactions are invisible. And rasterized references become outdated as soon as the source site updates.
The practical recommendation is to use screenshot-to-Figma tools as the entry point of a research workflow, not the destination. Capture widely using a tool like InspoAI, refine your reference set into a curated moodboard, then use those organized references to inform production Figma decisions.
One pattern that works particularly well: use a screenshot extension to build a "competitive landscape" frame in Figma at the start of every project. This frame becomes the living reference document that the whole team can consult without needing to re-do research. Source: Medium - Screenshot to Figma by AI
What should you look for when choosing a screenshot Figma extension?
Choosing the right screenshot Figma extension comes down to five criteria.
1. Capture fidelity. Does the tool capture full-page scrolling screenshots or only the visible viewport? For above-the-fold UI patterns, viewport capture is fine. For full landing page analysis, you need full-page capture.
2. Metadata attachment. Does the tool store the source URL, capture date, and any notes alongside the image? Without this, your reference library degrades fast.
3. Organization layer. Can you tag, folder, and search your captures? A tool that dumps all screenshots into a flat list forces you to do the organization work manually.
4. Figma export format. Does the tool export as a flat PNG, as a structured Figma frame with attached metadata, or as extracted design tokens? The richer the export, the less cleanup work you do in Figma.
5. Browser compatibility. Chrome extensions are the default, but if your team uses Safari or Firefox, check compatibility before committing.
InspoAI covers all five: full-page capture, URL and tag metadata, collection-based organization with AI search, and structured Figma export. For freelancers, the Lite plan at $5/month covers the basics. Teams benefit most from the Team plan at $29/month, which adds collaboration and shared collections.
Conclusion
Manual copy-paste wins on simplicity for a single asset. Screenshot Figma extensions win on everything else: speed at scale, metadata preservation, organization, and team collaboration. The shift from manual to extension-based research is not a workflow change so much as a mindset change: from "I need this one screenshot" to "I am building a systematic reference library."
If you are ready to close the gap between finding great design and using it in Figma, try InspoAI free at inspoai.io and see how the capture-to-Figma workflow changes your research sessions.