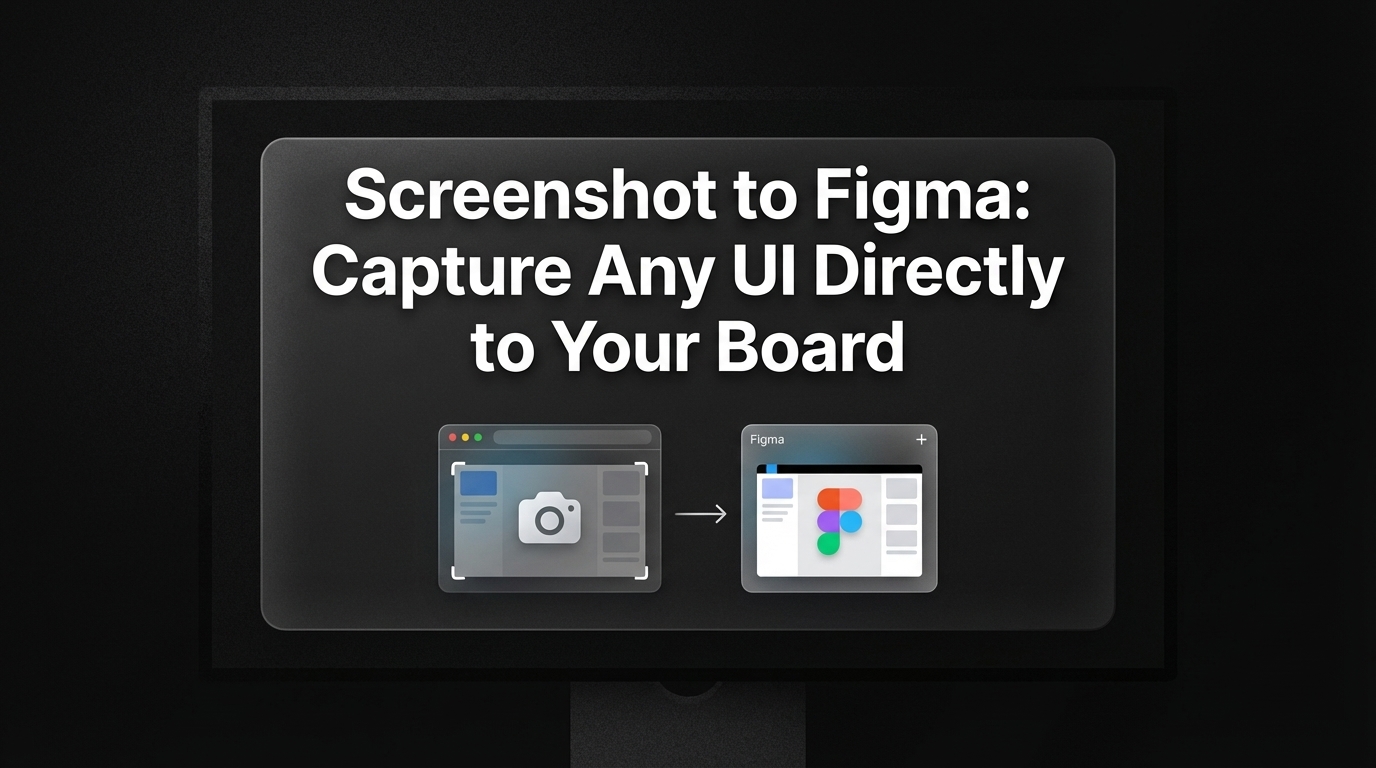
TLDR: Getting screenshots into Figma used to mean manually saving files, dragging them in, and resizing them one by one. Today, dedicated plugins and Chrome extensions make the screenshot to Figma workflow near-instant. This guide covers every method, from native Figma import to screenshot plugins and the Inspo AI Chrome extension that saves web UI directly to your moodboards, plus how to annotate and organize your captured references once they land on the canvas.
Introduction
Every designer has a version of the same story. You find an interface that does something interesting: an interaction, a layout pattern, a visual approach you have never seen quite like that. You want it in Figma. So you open a new tab, take a screenshot with your OS shortcut, hunt for the file in your downloads folder, drag it into Figma, resize it, label it, and start the process again for the next reference. Fifteen minutes later, you have a moodboard and a mild sense of frustration.
The screenshot to Figma workflow has been a persistent friction point for UI/UX designers, brand teams, and freelancers building competitive analyses, moodboards, and inspiration libraries. The gap between seeing something interesting on the web and having it usable inside Figma is where momentum breaks. Fortunately, that gap has narrowed significantly. Chrome extensions, dedicated Figma plugins, and AI-powered tools have made capturing, saving, and organizing web UI directly to Figma boards faster than ever in 2026.
What does "screenshot to Figma" mean and why do designers want it?
"Screenshot to Figma" describes any workflow where a designer captures a visual from a website, application, or screen and gets it onto a Figma canvas without the manual save-and-import dance. The goal is reducing the steps between seeing something worth capturing and having it available for reference, annotation, or moodboarding inside Figma.
Designers want this capability for several reasons. Moodboarding is the most common use case: building visual reference collections for branding projects, UI redesigns, or creative briefs. Competitive analysis is another major driver, where product designers and brand teams document how competitor interfaces look across different states, breakpoints, and flows. UI research and pattern documentation also depend heavily on screenshot capture, particularly for teams maintaining design libraries.
The traditional workflow treats screenshots as files: you capture them to your desktop or downloads folder, then import them into Figma manually. This creates organizational friction. Screenshots accumulate without context, file names become meaningless, and the connection between the captured image and the design work it informs gets lost.
A direct screenshot to Figma workflow keeps context intact. The capture goes straight to the frame or board it belongs to. Labels, annotations, and groupings happen in the same place as the design work. According to the Figma community discussion on efficient screenshot workflows, designers who use dedicated tools for this workflow report meaningful time savings, especially on research-heavy projects. The question is which tool fits your specific workflow best.
How do you take a screenshot directly into Figma?
Figma does not have a built-in "capture from browser" feature, but several native workflows get close. The simplest is the paste-from-clipboard method: take a screenshot using your OS shortcut (Cmd+Shift+4 on macOS, Windows+Shift+S on Windows), copy the result to your clipboard, switch to Figma, and press Cmd+V to paste. The image lands on the canvas as a raster layer ready to resize and position.
For a slightly more structured import, use Figma's Place Image command (File > Place Image or simply drag an image file directly into the browser tab running Figma). This lets you position the image precisely before confirming placement.
Neither method is truly direct in the sense of one-click capture. Both require leaving Figma, capturing, then returning. They work well for occasional references but become tedious at volume.
The Figma documentation on working with images confirms that drag-and-drop is the fastest native approach, but acknowledges it has limitations for full-page captures and responsive device views. Both the macOS and Windows native screenshot tools are limited to the visible viewport, which means long pages require scrolling captures or multiple screenshots stitched together.
For any designer capturing more than a handful of references per session, a plugin or extension is the practical solution.
What are the best Figma plugins for capturing web screenshots?
Several dedicated Figma plugins handle the screenshot to Figma pipeline, each with a distinct approach:
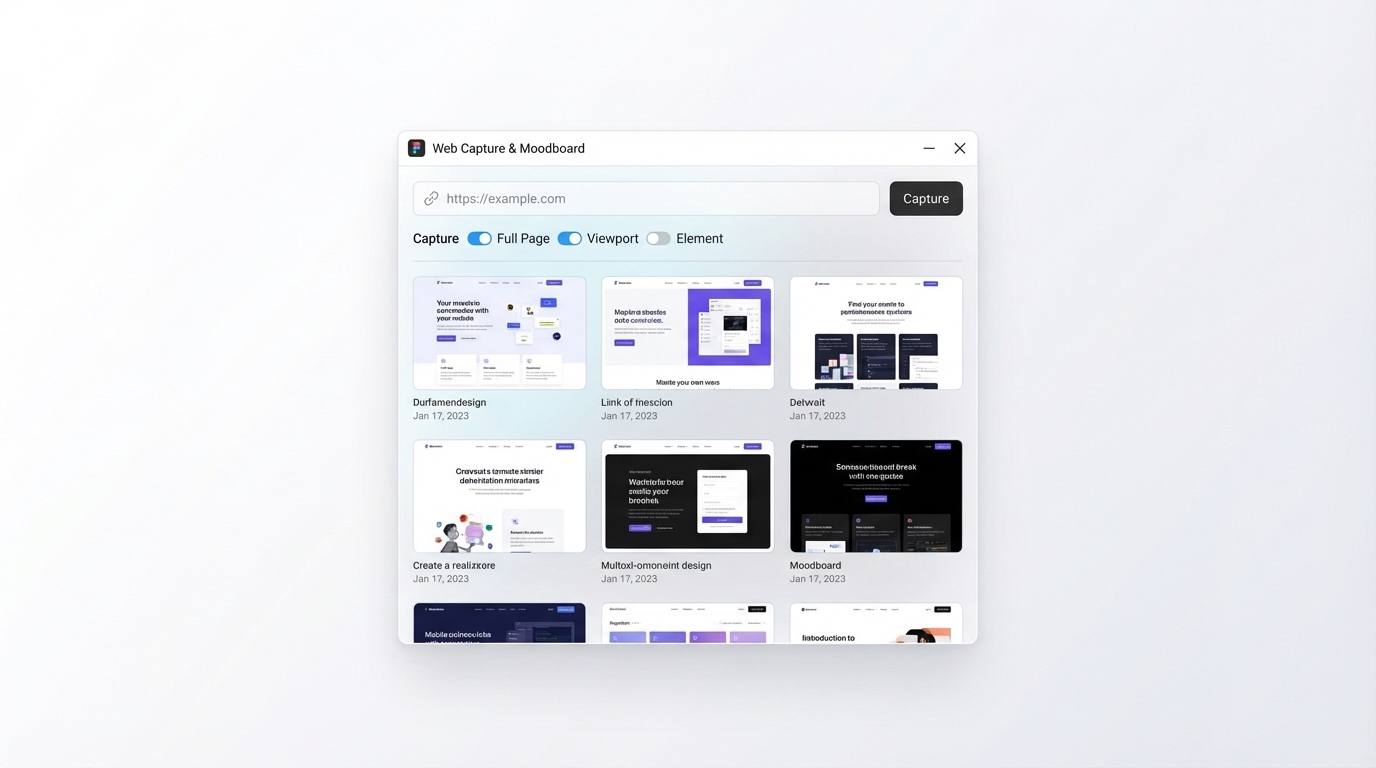
Figscreen is one of the most capable options for bulk screenshot import. It captures any URL as a high-fidelity screenshot, supports both full-page and viewport captures, and can process 25 URLs in a single batch. It auto-organizes screenshots on the Figma canvas and supports responsive captures at different device sizes. Figscreen is particularly strong for competitive analysis workflows where you need a dozen competitor pages captured and arranged in one operation.
Page Capture is a lightweight Figma community plugin focused on full-page screenshots. It renders pages including content below the fold, which standard OS screenshots cannot do. Useful for capturing landing pages and long-scroll interfaces in one frame.
Canvas Screenshot works the other direction, capturing your Figma canvas itself as a screenshot for sharing or presenting design work outside of Figma.
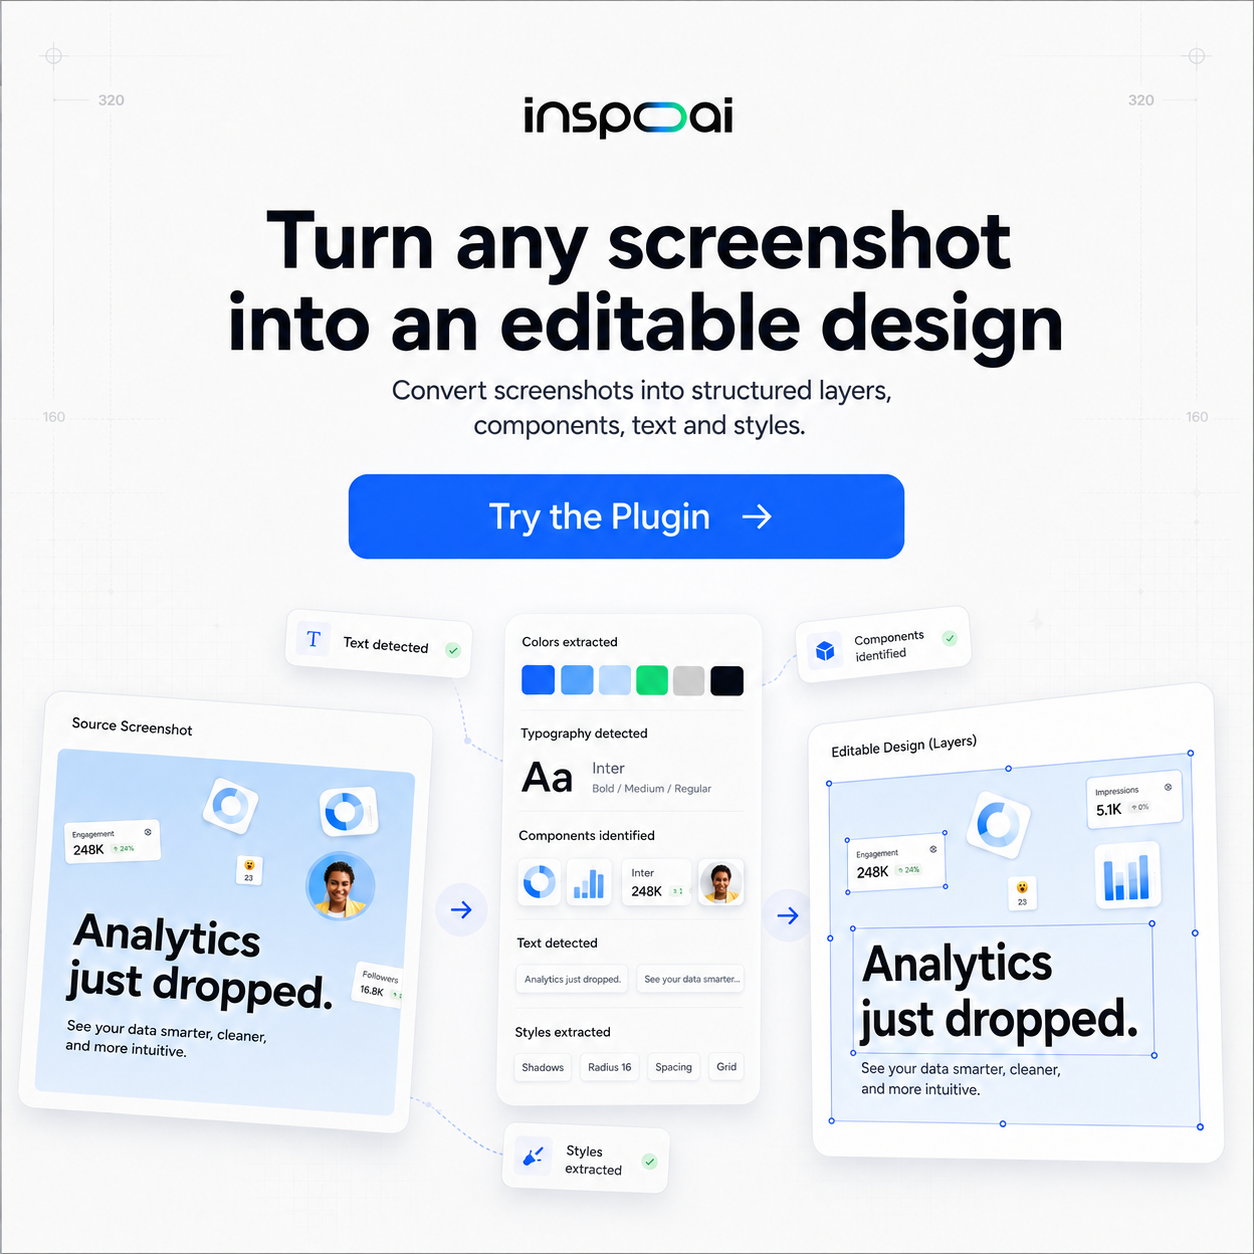
AI Screenshot to Figma by Superun goes further by using AI to convert screenshots into editable Figma components, extracting layers and auto-layout from the captured image.
For designers who want deep moodboarding and AI-powered search layered on top of screenshot capture, Inspo AI provides an integrated environment where your captured references connect directly to an AI-searchable design inspiration library.
How do you use the Inspo AI Chrome extension to save screenshots to Figma?
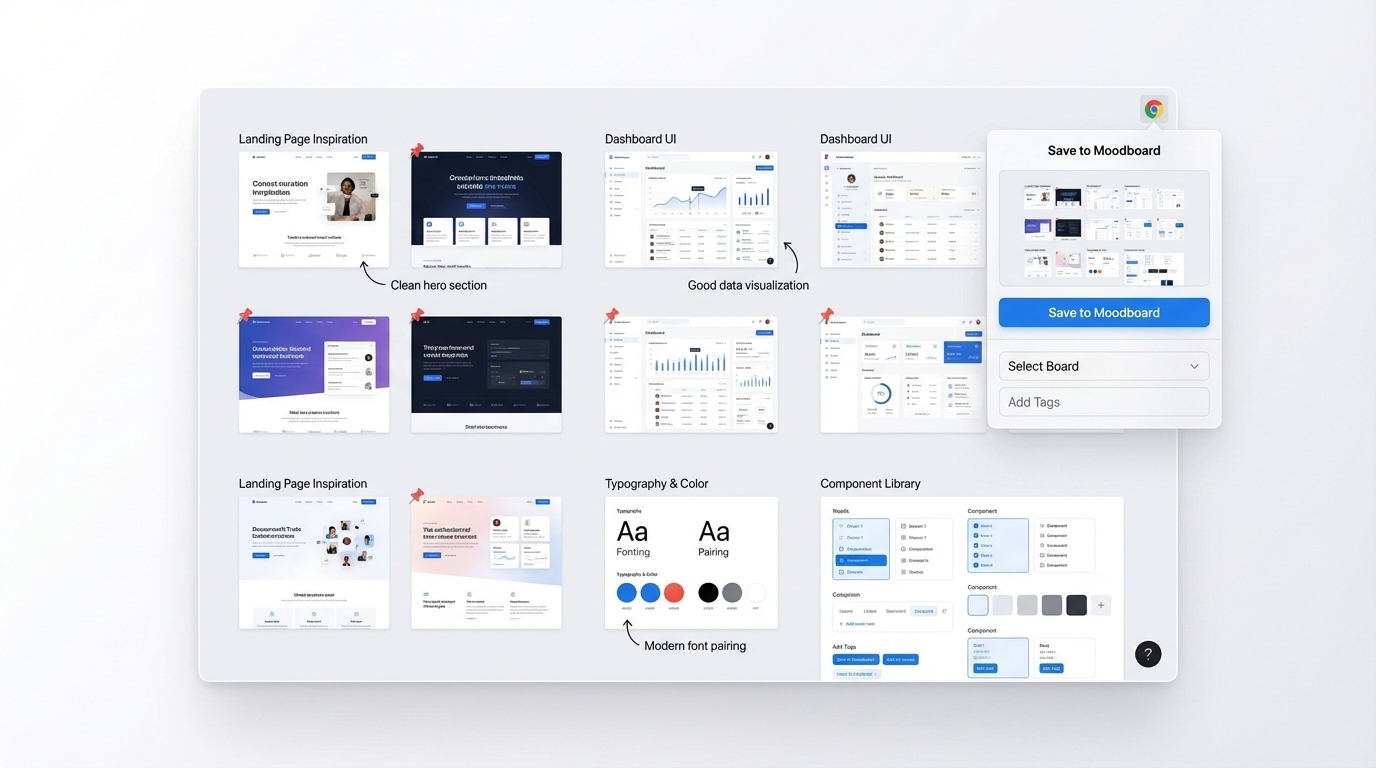
The Inspo AI Chrome extension is the most direct way to bridge the web-browsing-to-Figma gap in a single click. Here is how the workflow operates:
When you are browsing and find a UI element, page layout, or interaction worth capturing, you activate the Inspo AI extension from your Chrome toolbar. The extension lets you select the specific section of the page you want to capture, whether that is a navigation component, a hero section, a card pattern, or a full-page view. One click saves the screenshot directly to your Inspo AI account.
From there, the captured screenshot is immediately accessible inside your Inspo AI moodboard and can be pushed directly to your Figma board. The connection between Inspo AI and Figma means you do not need to download files or switch applications. Your captures go straight to the board you are actively working in, positioned and ready to annotate.
What makes this workflow particularly powerful is the layer of intelligence Inspo AI adds on top of raw screenshot capture. Each capture is searchable by visual style, component type, color palette, and design pattern. When you are working on a project and need to find "light glassmorphism nav components I saved three months ago," you can surface them immediately rather than scrolling through a folder of unnamed screenshots.
The extension integrates with Inspo AI's full platform, which includes the moodboard builder, AI design search, brand scanner, and creator studio. This means your screenshot captures become part of a broader design intelligence layer rather than isolated files. For UI/UX designers, brand teams, and freelancers who treat inspiration curation as a core part of their workflow, the Inspo AI Chrome extension collapses the gap between finding good design and using it productively inside Figma.
Can you capture full-page website screenshots into Figma?
Full-page screenshot capture is one of the most requested capabilities in the screenshot to Figma workflow, and it is one that native OS tools handle poorly. Standard keyboard shortcuts capture only what is visible in the current viewport. For a landing page that scrolls five viewports deep, you either take five separate screenshots or rely on a tool that can render the entire page as a single image.
Several approaches work well for full-page captures:
Browser DevTools: Chrome and Firefox both have a built-in full-page capture command accessible through the DevTools command palette. In Chrome, open DevTools, press Cmd+Shift+P, type "screenshot," and select "Capture full size screenshot." This captures the full page rendered at the current viewport width. The resulting image can then be imported into Figma via drag-and-drop or paste.
Figscreen: As noted above, Figscreen handles full-page capture natively from within Figma. You paste the URL, specify full-page mode, and the plugin renders and imports the complete page. It also supports responsive captures at mobile breakpoints, which is essential for competitive analysis of responsive layouts. Figscreen's documentation outlines the full-page and batch capture workflow in detail.
html.to.design: This plugin goes beyond screenshot capture and converts the full page's HTML and CSS into editable Figma layers. As described on the html.to.design blog, this is particularly valuable for redesign projects where you need a starting point that mirrors the live site structure rather than a flat raster image.
For moodboarding purposes, raster full-page screenshots from Figscreen or browser DevTools are usually sufficient. For redesign or handoff work, html.to.design's editable layer output is the more practical choice.
How do you organize and annotate screenshot captures in Figma?
Capturing screenshots into Figma is only half the workflow. How you organize and annotate them determines whether the collection is genuinely useful or simply a pile of images. A few structural approaches make a significant difference.
Use named frames as containers. Place related screenshots into a dedicated frame labeled by project phase, reference category, or competitor name. This keeps the canvas scannable and makes it easy to share specific sections with collaborators without sharing everything.
Add text annotations directly below each screenshot. A brief note capturing why you saved a particular reference (the interaction, the layout decision, the color use) makes the collection useful weeks or months later when the visual context alone is not enough.
Use Figma's section feature to group multiple frames together. Sections act as labeled containers that visually separate different parts of a moodboard or research document. This is especially useful for competitive analyses where you need to separate three or four different companies' approaches.
Color-code with sticky notes. FigJam-style sticky notes in Figma let you flag captures with categories like "typography reference," "motion reference," or "navigation pattern," creating a tagging system without needing a separate application.
For teams that capture references at volume, Inspo AI's moodboard builder provides structured organization inside the platform itself, so your tagged and categorized references stay connected to the original capture context when pushed to Figma.
What are the best workflows for saving web inspiration to Figma?
The best screenshot to Figma workflow depends on your use case and how much friction you are willing to tolerate. Here are three workflows ranked from quickest to most comprehensive:
Quick capture for one-off references: Use your OS screenshot shortcut and paste directly into Figma. Fast and zero setup. Works well when you need one reference quickly and do not need to maintain a structured library.
Batch competitive analysis: Use Figscreen to queue a list of competitor URLs, capture full-page screenshots at desktop and mobile breakpoints, and have them auto-arranged on your Figma canvas. Follow this with text annotation frames for each competitor. This workflow turns a two-hour manual process into roughly 20 minutes of organized work.
Ongoing inspiration library with Figma integration: Install the Inspo AI Chrome extension and use it as your primary capture tool as you browse. Screenshots go to your Inspo AI moodboard, where they are tagged, searchable, and ready to push to any Figma board you are working in. Pair this with Inspo AI's AI design search to find related references you may have missed, and you have a continuously growing, intelligently organized inspiration library that follows you across projects. This is the workflow that serious designers use to build long-term reference libraries that compound in value over time.
The Figma best practices guide on working with images recommends maintaining a dedicated reference file separate from active design work, so your inspiration captures stay accessible without cluttering production files.
Conclusion: Close the Gap Between Inspiration and Figma
The screenshot to Figma gap has always been a workflow tax on designers who take inspiration curation seriously. Every manual step between seeing something interesting on the web and having it usable inside Figma is friction that breaks momentum and discourages thorough research.
The tools covered in this guide, from Figscreen and Page Capture to the Inspo AI Chrome extension, remove that friction at different levels. Figscreen handles bulk URL capture. Page Capture handles full-page renders. Inspo AI handles the complete pipeline from browser capture to searchable, organized, Figma-ready inspiration library.
If you want to build a faster, smarter web-to-Figma workflow, start with the tools designed for it. The Inspo AI Chrome extension plus the Figma integration gives you a one-click path from any website to your active design board.
Ready to upgrade your inspiration workflow? Explore the tools at Inspo AI and start building a design inspiration library that actually keeps up with how fast you work.